If your Unity project runs without issues but displays numerous red errors when opened in Visual Studio, you're not alone. This is a common problem many developers face, especially in 2025, due to various updates in Unity, Visual Studio, and C# tooling. Fortunately, there are several ways to fix this issue.
Understanding the Problem
When Visual Studio highlights errors in your Unity project despite the game running fine, the problem often lies in:
- Missing or outdated dependencies – Visual Studio might not have the correct Unity or .NET components installed.
- Incorrect project settings – Unity’s integration with Visual Studio may not be properly configured.
- Broken IntelliSense – The autocomplete and error-checking system may not be working correctly.
How to Fix Red Errors in Visual Studio for Unity
1. Regenerate Project Files
Unity sometimes fails to update Visual Studio’s project files correctly. To fix this:
- Open Unity Editor and go to Edit > Preferences > External Tools.
- Ensure External Script Editor is set to Visual Studio 2022/2025 (depending on your installed version).
- Check the box for Generate all .csproj files.
- Close Unity and delete the following files from your project folder:
.vs/(hidden folder)Library/Logs/obj/UserSettings/
- Restart Unity and open the project again.
2. Update Visual Studio and Unity Editor
- Ensure you are using the latest versions of Visual Studio and Unity Editor.
- Open Visual Studio Installer, check for updates, and install any missing Unity-related components.
- In Unity, go to Help > Check for Updates and install the latest version if needed.
3. Install or Repair Unity Tools for Visual Studio
- Open Visual Studio Installer.
- Click Modify on your installed version of Visual Studio.
- Under Workloads, ensure Game development with Unity is checked.
- Under Individual Components, ensure the following are installed:
- .NET SDK (latest version supported by Unity)
- Unity Editor Package
- C# and .NET Compiler Tools
- Click Modify to install missing components.
4. Fix IntelliSense Issues
- If IntelliSense is not working, try these steps:
- Open Visual Studio and go to Tools > Options > Text Editor > C# > Advanced.
- Enable Enable full solution analysis.
- Restart Visual Studio.
- If errors persist, try Rebuilding the Solution (
Ctrl+Shift+B).
5. Ensure Correct .NET Framework Version
Sometimes, using the wrong .NET version causes Visual Studio to misinterpret Unity’s scripts. To check:
- Open Project Settings in Unity.
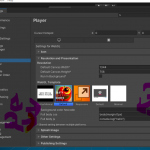
- Navigate to Player > Other Settings.
- Under Configuration, set Scripting Runtime Version to the latest supported version.
- Set API Compatibility Level to .NET Standard 2.1 or .NET Framework 4.x (depending on your project requirements).
6. Manually Open the Correct Solution File
- Unity sometimes generates multiple
.slnfiles. - Open your Unity project folder, locate the
.slnfile, and open it in Visual Studio manually. - Ensure you are opening the correct solution file, not an outdated or backup version.
Final Thoughts
While it can be frustrating to see red errors in Visual Studio despite your Unity project running smoothly, these issues are usually related to missing configurations, outdated components, or IntelliSense problems. Following the steps above should resolve most common errors and restore proper Visual Studio integration with Unity.
If the issue persists, consider reinstalling Visual Studio and Unity or checking community forums for updates on known compatibility issues in 2025.
This guide ensures clarity and step-by-step solutions for fixing Unity-VS errors in 2025. Let me know if you'd like any refinements! 🚀


